September 11, 2011

Foraging!

It's been 24 hours and we're not dead yet!


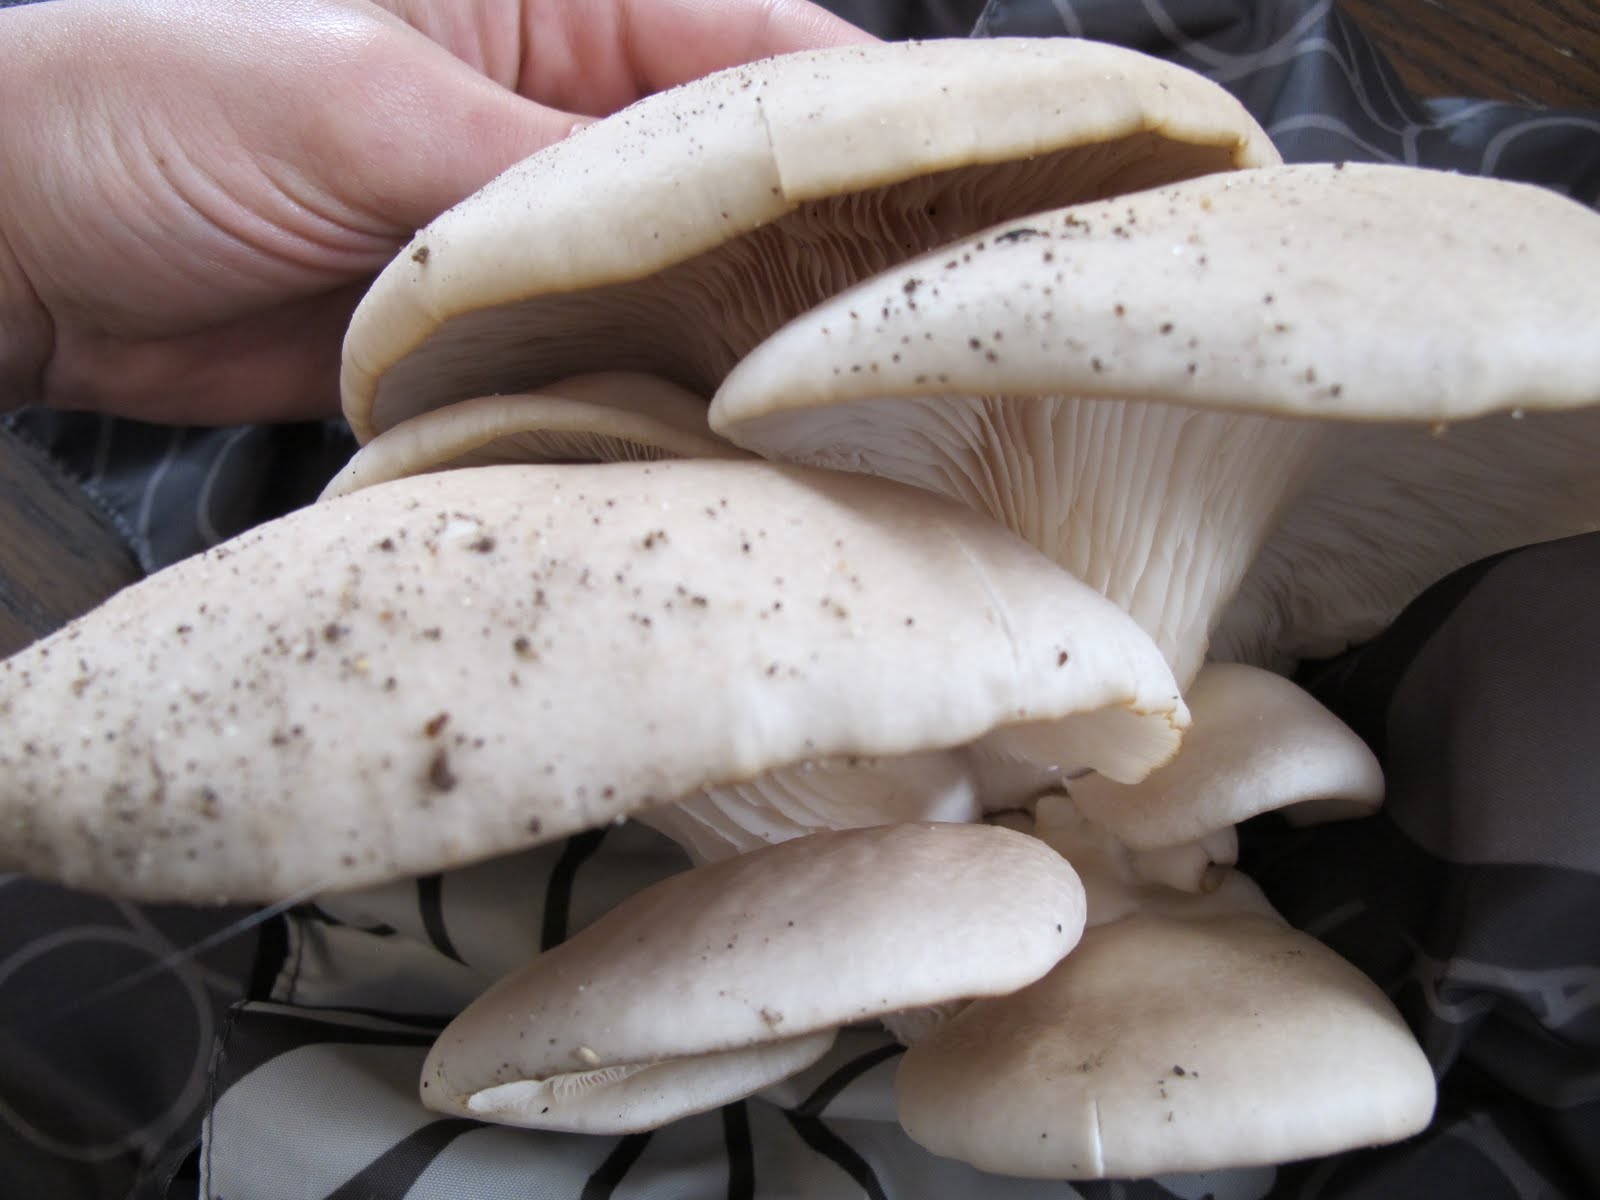
Positively identified these Oyster mushrooms! Ben and I found them on a dead tree in a flooded bog on a hike on Sunday and cooked up some Wild Oyster Mushroom Risotto last night... and survived to tell about it! This was my second mushroom find since the morels I found this spring!

Wild Mushroom Risotto adapted from Epicurious,com
Two servings as a main dish

about 28 oz beef stock (or veggie or chicken... your preference)
1.5 Tb Butter (unsalted)
1 Tb EVOO
1 Shallot, chopped
1/2 Lb Wild Mushrooms, sliced
1/2 cup Arborio Rice
1/4 cup dry White Wine ( or water with 1 Tsp white wine vinegar in a pinch)
1/2 tsp fresh Thyme
2 Tb EVOO or melted butter
1/4 cup freshly grated Parmesan Cheese

Heat stock over low heat until hot but not simmering, keep hot.

Head butter and oil over med heat and sauté shallots about 30 seconds. 
Add mushrooms and sauté until juices are released, about 8 minutes.
Add rice and stir to coat thoroughly, cook about 2 minutes until hot but not browning.
Add wine and cook, stirring occasionally, until almost completely absorbed, about 5 minutes.
Add 3/4 cup of stock and cook, stirring occasionally, until almost completely absorbed (rice should be beginning to stick).
Continue adding stock 3/4 cup, then decreasing the amount after the first few minutes to about 1/2 cup at a time until rice is cooked through and tender. This may take up to 20 minutes, but start checking after 14. The last addition of stock should leave the rice slightly loose.
Remove from heat, mix in vigorously oil and Parm. 
Add thyme, season with S&P.and stir.
Enjoy :)

I would put up a picture of the Risotto finished but it's pretty brown! Really tasty though!

Would you eat mushrooms you found in the woods? If you learn enough about it first it's worth a try!

August 16, 2011

Lack of posting...

So sorry for the lack of garden updates! The weather is giving the garden a run for its money... most of the tomatoes are cracking, and things just aren't pretty enough for pictures... maybe when the sun comes out I can get a few!

Green beans have been pretty productive. I'd recommend the "Top Crop" heirloom. They have given me two huge crops and some pretty nice seeds I'm saving for next year!

The "Sungold Cherry" is a amazingly productive plant with tasty little orange tomatoes. This one has done better than the other 3 varieties I've tried this year.

My pumpkins and zucchini have been murdered by Squash Vine Borers... icky little things. I think I salvaged the big pumpkin plant- but it only has one pumpkin on it! Otherwise I had one each of sugar pumpkin and round zucchini...

I did start a new herb garden out behind my kitchen. The chives, thyme, oregano, catnip and mint that I started in pots from seed seem to like their new home there.


I planted sage and rosemary in pots to bring in for the winter, both are looking happy as well.

Carrots and potatoes have, by far, been the easiest thing to grow. Although the carrots took a few tries to get germinated (kept starting too early- crazy spring heat waves then freezing temps killed a few rounds of planting) but once they took hold they grew like mad with no bugs bothering them. The potatoes (storebought Yukon Golds that sprouted in the compost) are all ready died back and as soon as things dry out I'll be knocking over the tub to harvest! I did dig in to see what was under there and found a few big round things that look like potatoes!!

So... hopefully things will turn around a bit and I'll have some new pics for you soon!

July 18, 2011

A few pics... More to come :)

 Cucumbers!
 Swiss Chard and Pole Beans (Growing on Fence)
 Pumpkin Patch! No babies yet...
 All ready harvested this Round Zucchini! It got about 1" wider.
 Cubanells, my favorite peppers! Also have had a few jalapenos all ready!
 Sun Gold Cherry doing GREAT!
 Heirloom Tomatoes!
Carrots, just starting to peek their shoulders up... will have a close up soon!


PS: Please read about the Oak Park Michigan case!
Oak Park Front Yard Garden...

July 4, 2011

Early Summer Harvest - Quick Any-Time Meal

Tonight I made a delicious frittata (or tortilla, or crustless quiche). It was fast and easy and can be adapted to anything you have on hand. It's all about knowing the ratio!


Here's the basic recipe:

4 Whole Fresh Eggs
4 Fresh Egg Whites (save the 4 yolks for a pint of ice cream if you have an ice cream maker)
1/2 cup Kefir or Greek Yogurt
1/2 tsp salt
few grinds pepper

First you will whisk these together just until blended.

To this, fold in: 1 cup (approx.) any fresh veggies on hand, cut small enough to cook through in a few minutes, and plenty of fresh herbs. (cheese optional- always)

Here I used:
1/2 of a med yellow squash cut into 1/8" slices
5-6 snow peas, sliced on the bias, 1/8" thick
1 handfull of green beans, cut into 1/4" pieces
2 garlic scapes, cut into 1/4" pieces
1 scallion, sliced 1/8" thick
Fresh basil
1/4 cup shredded cheddar

HEAT oven to 450 and a 10" cast iron skillet (please throw away your non-stick crap and buy one) over medium heat on stovetop. Melt 1 Tb butter. Add in frittata mixture. Cook over medium heat for 5 minutes until it starts to barely bubble underneath. Use a rubber spatula (see previous recipe post for note) to loosen around edge and drizzle a little EVOO around the edges. This will prevent them from sticking and give a nice golden crisp to the edge...

Now, move the skillet from the stovetop to the middle of the oven. Continue cooking an additional 7-10 minutes until set. Cool for a minute then loosen edges again with handy dandy spatula and turn out onto a platter (hardest part - but cast iron rocks and doesn't stick!)

Garnish with some flaked sea salt and fresh parsley & chives (which have more vitamin C in a teaspoon than a glass of OJ by the way).


Tonight's frittata was made with nothing from farther away than VT. From my own garden: Radishes, Basil, Chives, Parsley, Green Beans and Scallions! Play around, see what you have.

June 14, 2011

Garden Update 6/13

Harvested all the lettuce yesterday!


Monster Tomato! Golden Cherry from the nursery... got a nice cluster of buds!
These tomatoes I started from seed! Heirloom "Early Red Cheif"

Potatoes I pulled from the compost bin where they were trying to grow!
Heirloom "Top Crop" Green Beans. Bush type, growing intensively in a container!

And all ready lot's of little bean flowers!

Ridiculously fast growing radishes. "Cherry Belle"
Planted from seed only a few weeks ago and almost fat enough to harvest! I don't even know if I like radishes!
Basil... also from seed! Gonna be making some pesto in a few weeks!

Started this Chive and Thyme from seed. Eventually they will live in the back garden!

Jalapeno Babies!

Recently started "Kentucky Wonder" mix of green and wax beans! Pole type will cover that fence soon!

Pumpkins! Lost one to wind, still 2 healthy ones!

A  new cucumber "Spacemaster" that can be grown in hanging planters!

In the center of this photo is a big Horseradish plant Ben's friend gave us last year! I almost pulled it out thinking it was weeds but looks like we will have a bumper crop! Sinus cleanser anyone?


 So far so good, I'd say!

Ben's muscles and my green thumb will have us eating good soon enough!

We've all ready been eating salads for a few months, and peas too (though our crop was sad... will plant more for fall!) But this is what they looked like!


Fresh garden peas quickly blanched then sauteed in butter with shallots and kosher salt!


June 10, 2011

First Post: Starting Simple

Ok! First post... a simple recipe I perfected last night after multiple attempts at creating a relatively healthy, chewy granola bar! I used this recipe as a starting point. 

Best Chewy Granola Bars!
1 c. Old Fashioned Rolled Oats
1 c. Bob's Red Mill 5 Grain Cereal (contains flax, oats, other healthy bites)
1/2 c. Raw Wheat Germ 
1 1/2 c. Raw, Slivered Almonds (coarsely chopped in food processor)
1/2 c. Shredded, UNsweetened Coconut
1/4 c. Sesame Seeds (raw)
1/4 c  Pumpkin Seeds (raw)

Mix all of the above on a rimmed baking sheet and toast at 325 F for about 15-20 minutes, stirring every 5 minutes, until the oats are lightly toasted and the aroma fills the kitchen!

Line a 9x13" glass or metal baking dish (the straighter the sides the better) with parchment so it overhangs a few inches on each end to allow you to lift the bars out.

Meanwhile:

Gather and set aside: 
               1/2 c. Dried Apricots or other Dried Fruit, Chopped
               1/2 c. Golden Raisins
               1/2 c. Chocolate Chips (all optional- but fruit adds to the chewiness)
Then: Combine in a medium saucepan over med-low heat  and heat gently until combined.

               2/3 c. Honey
               3 Tb + 1 tsp Coconut Oil
               1/2 tsp Kosher Salt
               1 tsp Vanilla Extract


When all components are ready, decrease oven heat to 300F. 

Mix the oat mixture into the melted honey & oil mixture and stir to coat. 
Next, stir in the dried fruit. If adding chocolate chips you may wish to cool the mixture a bit before adding them. If you don't, you'll have more of a chocolate laced bar than one with any chips in it... but it's chocolate, so in either scenario, it's gonna be good :)

Spread the mixture with a rubber spatula (you should have at least 10 of these if you do any cooking) into the pan so it's nice and even and spread into all the corners.

Bake in lower part of oven for about 25 minutes.

It's hard to tell what done is... it was still very soft to the touch, but toasted nicely and pulling away from the sides of the pan.

Place the pan on a cooling rack for about 1o minutes. Then, SLICE the bars. Do not wait until it's completely cool! I sliced 16 bars out of mine (about 1 1/4" wide by 4 1/2" long.) After slicing allow to cool completely then lift the bars via the paper out of the pan! Store in airtight container for a week or so (if they last that long before you DEVOUR them!!)

SO- Almond, Apricot, Coconut this time... 
What flavors should we try next time?

NEXT UP:  Garden Update!